Learn how to use Selective Sync to choose which schools and classes will be synced to the Administrator Portal
Tip: Selective Sync allows you to choose which schools, classes, and users are synced to the Administrator Portal. This is a great way to ensure that only those that need access to GSEonline are synced in the Administrator Portal.
Important: This option is only available to those rostering with ClassLink, OneRoster API, or OneRoster SFTP
1. Login to a District account
Tip: If you are unsure whether you are in a school level or district level account, check out the guides below:
2. Click "Schools" at the top of the page
Note: If you do not see a Schools option, you may be logged into a School account

3. Click the arrow to open the sync dropdown menu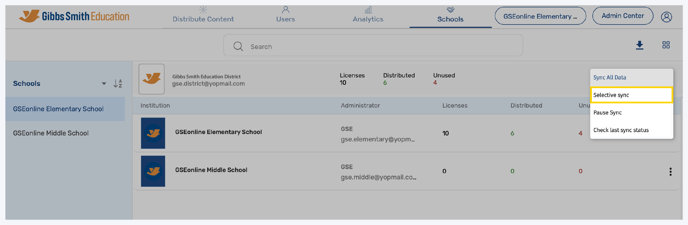
Important: If you click Sync All Data then all roster data will be synced, which may include data that is not intended for GSEonline. Example: Your roster data contains 10 schools, but you have only purchased access for 3 schools, if you select Sync All Data then all 10 schools will be created.
4. Click "Selective Sync"

5. Wait for data to load
Note: This process may take some time

6. There are two options for this step:
Option 1: Click the checkboxes next to the schools you would like to sync
Option 2: Click the Download icon to download data as a CSV file, fill in the CSV file, then upload it
Tip: Click Select All to select all schools
Important:
- If you choose Option 2 and download the CSV file, you must put "yes" under the sync column for the schools you would like to sync and "no" for those you would not like to sync
- If you choose Option 2, once you fill in the CSV file, you must re-upload it by clicking the Upload icon

7. Click "Next"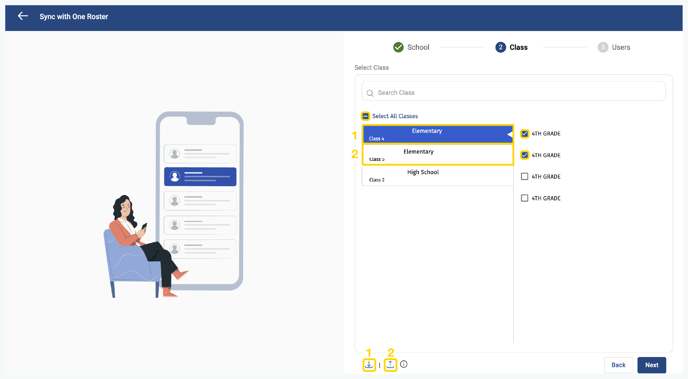
8. There are two options for this step:
Option 1: Click the checkboxes next to the classes you would like to sync
Option 2: Click the Download icon to download data as a CSV file, fill in the CSV file, then upload it
Tip: Click Select All Classes to select all
Important:
- If you choose Option 2 and download the CSV file, you must put "yes" under the sync column for the classes you would like to sync and "no" for those you would not like to sync
- If you choose Option 2, once you fill in the CSV file, you must re-upload it by clicking the Upload icon

9. Click "Next"
10. Select the Student Type or status for the users to be synced
• You can select multiple student types
• If you would like these options to be the default next time you use Selective Sync, click the checkbox next to Keep this setting default for next time onwards

11. Click "Sync"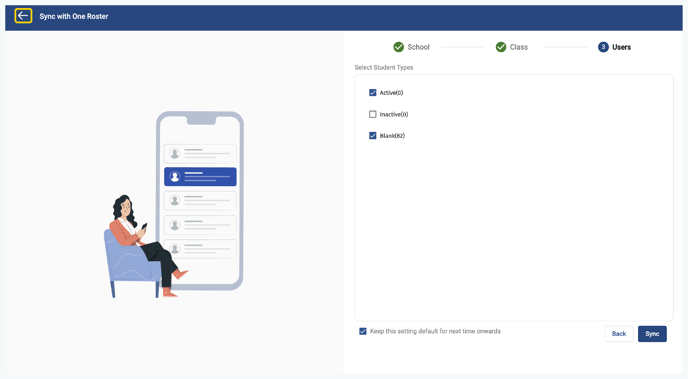
12. Wait for sync to complete
Note: This process may take some time
13. To exit Selective Sync, click the back arrow in the top left corner
Having trouble? Try enabling pop-ups and clearing cache and cookies.